

Hi everyone!
It's my turn to show you a tutorial or tips at the Kraftin' Kimmie Stamps blog.
Did you ever tried embossing paste on your card or other creation?
It's not so difficult as it seems, give it a try and find out!
I bought the embossing paste and used them on my Christmascards to add a snow texture. You can do so many other things with it after Christmas!
For this example I'm using my card of the last previews from Cheryl's new fabulous set "It's a beautiful day!", a stencil (with bricks this time), embossing paste and a spatula. I also used a paintbrush and some masking tape but it's not on the picture.
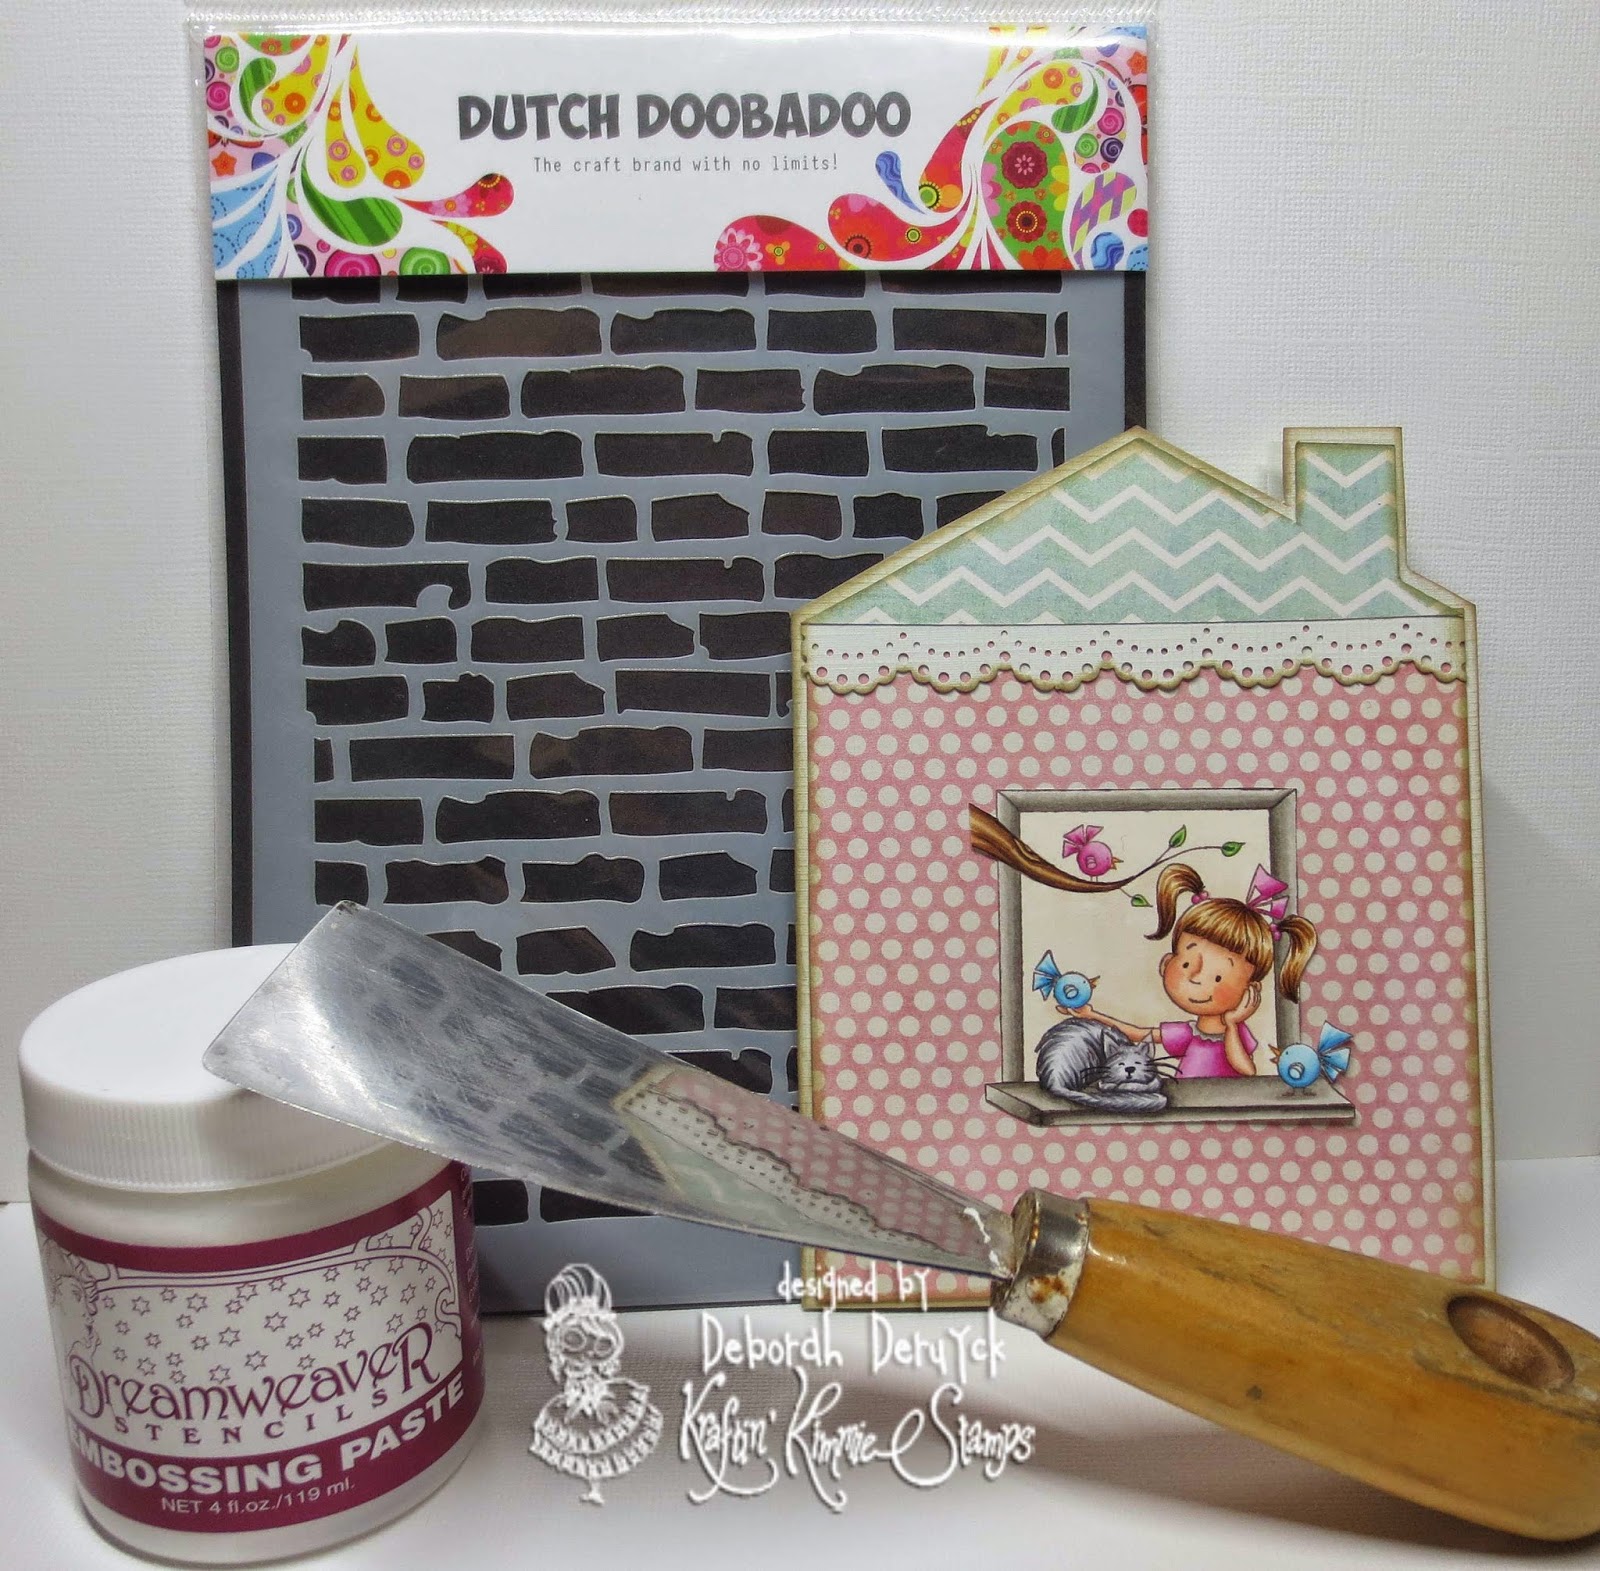
First I've used some masking tape to get the stencil stick on the right spot, so it can't move.
I looked for the smallest bricks on the template, so it compared with the card.

Take with your paintbrush some paste and fill the bricks that you want to have on your card.

Go over your bricks with the spatula and watch over it that the bricks are completely filled with the paste.

Remove the stencil from your card/paper. Now you can first clean your stencil, paint brush and spatula.
I did it with a babytowel, but you can do it in water and soap too. If there's some paste on the card that you don't want, you can take it off with your brush. So easy!

Now it's time to let it dry! You can wait till it dries from the air but you can also use your heater!!
And that goes FAST! It need to go fast for me, because I don't have the patience to wait, hehe.

After it's dry you can use some inkt, panpastels or some other things to give it a colour, but I liked it white this time.
And now you can finish your project!

And this is the card I've made with it!
I hope you liked it! Thank you for reading my post!
Happy Kraftin'!
No comments:
Post a Comment