Hey yall!
Tangii here with this weeks “Tips & Tutes” post. Today we are going to make our gorgeous cards
a little more “mail ready”, a little eye-candy for the mail man! Now I don’t mind taking my time making a card
that I am proud to give away, but I certainly don’t have the momentum to then
spend tons of time on the inside or the envelope!! Today we’re gonna do just a couple of quick
things to make our cards a little more “mail ready”!
To start, I grabbed a couple of cards from
last week’s peeks, Prince Charming (Once
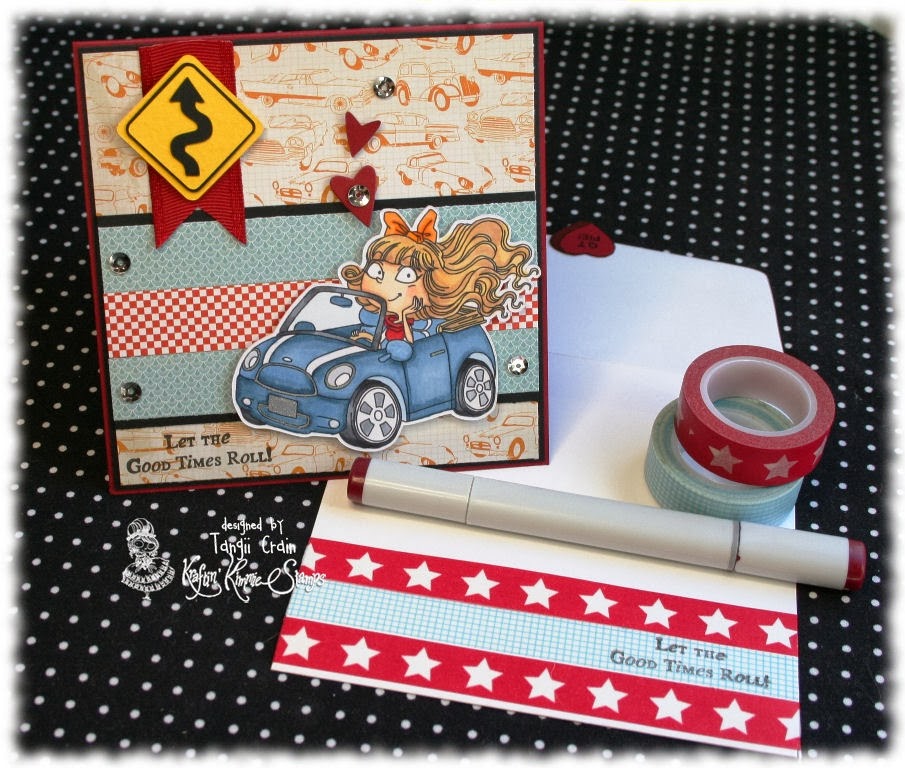
Upon a Time 4) and Convertible Girl (Let
the Good Times Roll).
For this card, I’m keeping things VERY
basic. Now we want to keep the envelopes
flat (no layers, no embellies that’ll stick up) cause you know they’ll just get
torn off and possibly rip the envelope, so I grabbed some Washi Tape that went
with my card pretty well! Taped on 3
strips and then took one of the sentiments from the set and stamped it right on
the tape (you’ll want to add some Embossing Powder and heat set a little to dry
the ink here).
For the back I stamped one of the hearts
from the Candy
Hearts set (and one of the Trinkets
sets or Sleigh
Mail, etc. would also work fabulously!).
I took my R59 Copic and colored the little shadowed side of the heart,
but really it was fine if I didn’t.
For my next card, I added a little more but
still keeping it quick and simple! For
the envelope I added some coordinating Washi tape and also stamped Prince
Charming in some Red Vivid ink, coloring just the flower to make it stand out.
This time I’m gonna add a little “somethin’
somethin’” on the inside. I took some
scraps that coordinate with the front and added them inside on top of a Vanilla
cs panel. Now here’s the fun part… I
didn’t want to stamp Charming inside, because
I wanted a plenty of writing space, so I decided to just add a couple of
the flower he holds in his hand. I could
have done the whole masking thing, but honestly that takes too much time for
something like this so instead I grabbed some painters tape.
I’m just going to tape over all of the
parts I don’t want, everything but the rose
(I can hear Kimmie cringing at my dirty stamp, lol). Now peel the tape back a little before
inking up the rose (remember you don’t
want any ink on the tape!). Now stamp
and color! Easy peesy! Decorating both envelopes and the inside took
less time than it took me to write up this post!!! Well that’s it for me, thanks for popping by!


What a great idea! Eye candy for the mailman! Thanks for sharing! I'm definitely going to try this! I need to use my washi tape, too!
ReplyDeleteCan't wait to see Angela :)
DeleteAwesome great tips Tangii! I don't usually do the insides let alone the envies:-) TFS.
ReplyDeleteLove what you did with the inside and envelopes!
ReplyDeletexxx Margreet
How beautiful!
ReplyDeleteSuper cute ideas!!! :))
ReplyDeleteI'm too lazy to mask, too...!!! Lol
I tape over the stamp, then ink, then remove tape. Tee hee!!!
Great tute!! :))
I never think to do the envelopes!!
That's awesome, Tangii!! You have done a great job with this tute!! You have inspired me to do more with my envelopes and card insides!! So good!!
ReplyDeletethat is a great idea.. quick, simple and pretty! love it!!
ReplyDeletexx
Wow...great tips Tangii...thanks for sharing.
ReplyDelete