

Hello! Welcome to Kraft-tember! Larisa here sharing a fun Krafty Tutorial and Challenge! It's all about FLOWERS! I see so many posts from fellow crafters who struggle with arranging paper flowers and ask for advice so I thought I would pop in here and share a little tutorial about what works for me.
Scroll down to the bottom of page for Challenge Details.
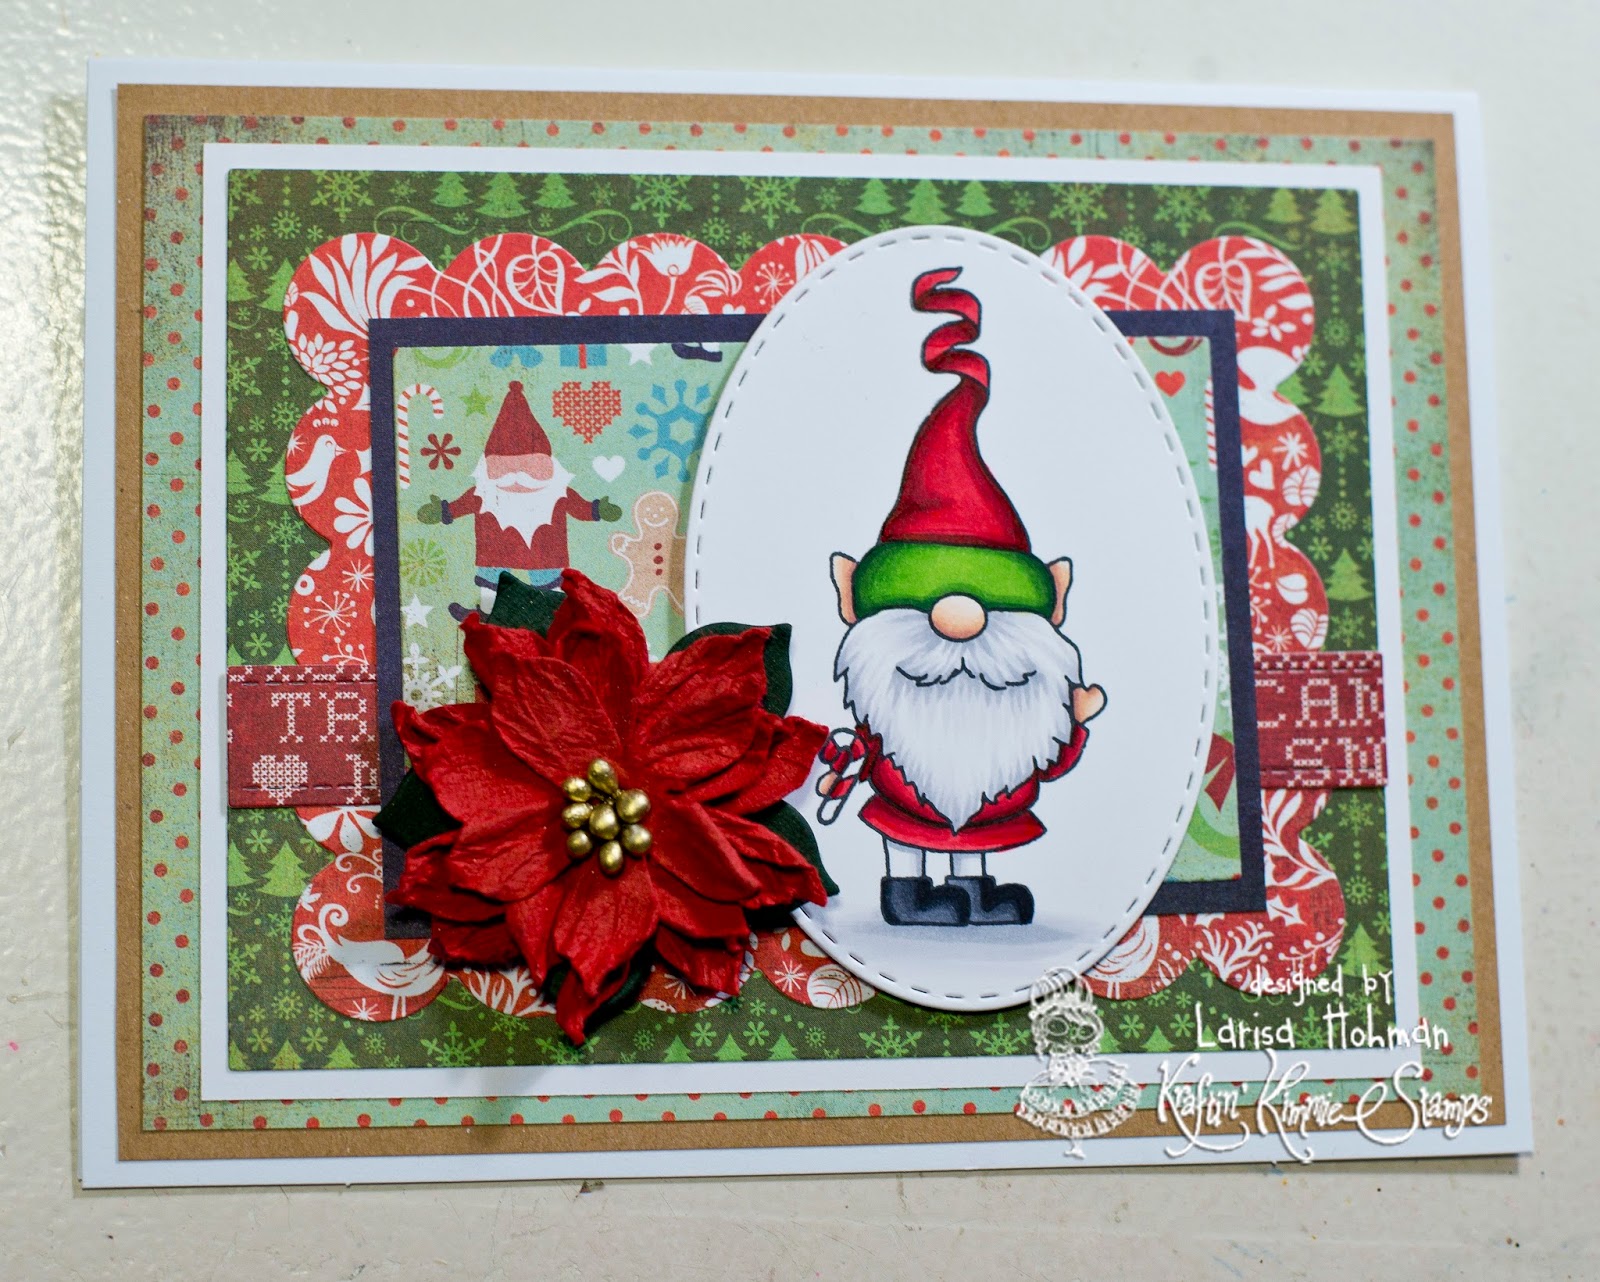
First I start with my card... I decided to use one of the adorable Gnomes from the Whimsical Gnomes Set to create a Christmas card. I masked in a little candy cane which will be available in one of the new sets that will preview this week!

Then, I gather my supplies. I typically use paper flowers from Wild Orchid Crafts, but I found these poinsettias at Hobby Lobby in the Christmas section and I thought they would be perfect for my card. I also picked up some long red stamens in the same section. The leaves are from Wild Orchid Crafts, and I always use my glue gun to attach paper flowers. Out of all the products I've used, it think it works the best for adhering them quickly and securely.

After, I have gathered my supplies, I try to get a general idea of where I would like the flowers to go. Almost always, I try to anchor them in the corner of my stamped image. I find that if you have them "floating" in the middle of the card, it just looks a little off. So I usually put them in one of the bottom or top corners.
Somewhere along the line, I heard that it's best to arrange flowers in odd numbers so I do try to stick to this, although it doesn't ALWAYS happen that way. Sometimes they end up being even, but I always start out with the intention of using an odd number.

I start with the largest flower first and put it in the corner of my image. Then I place my smaller flowers on the sides and create a little fame-effect. If I have more than two sizes of flowers I want to use, I just start with the largest and work my way down. Tiny flowers are perfect for tucking into the arrangement at the end.
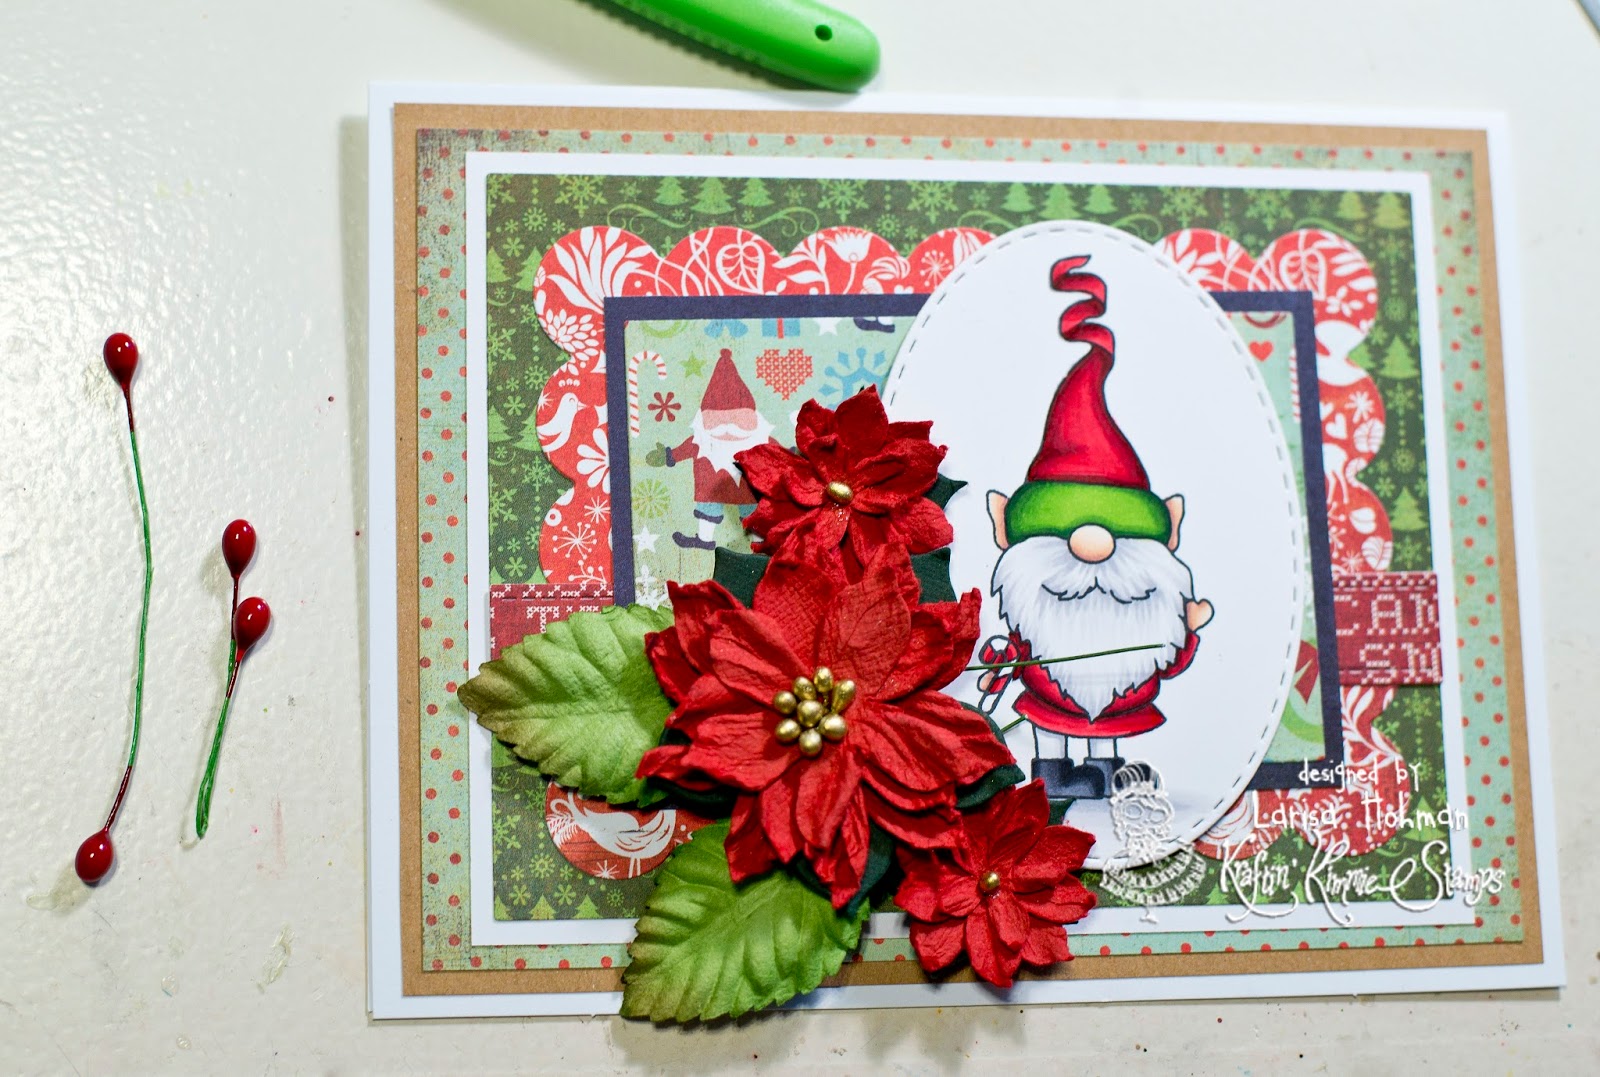
The next step is to add in any extras. This might be leaves, sprays, pearls, die cut swirls, die cut branches or foliage, etc. For my card, I will be adding a couple of paper leaves and the red long stamens. For the stamens, I like to bend them in half so that
one side is just a little longer than the other. These particular ones have a wire center so they hold their shape after you bend them. When adding something like leaves, I try to balance the arrangement out. The flowers are mostly on the right side so I add my leaves to the left side. Also, notice I'm adding two leaves so that I will still have an odd number of items in my arrangement. :)

I lay everything out on my card and make sure it's where I want it. Notice I tucked the stamen in as well. I like to create a sense of height with items like these so I will usually put them at the top and one on the bottom, extending the little frame arrangement. Then I just add a little here and there where I feel like there's an open spot.

Once I've laid it all out and I'm happy with it, then I glue it down with my glue gun. I start with the bottom layer first so I glue down the leaves, then the stamen and finally the flowers. After I finished, it still felt like the arrangement needed something so I added some tiny pinecones that I also found in the Christmas section at Hobby Lobby.

I added a little banner and button and here you have it, my finished card! Hope this tutorial was helpful. If you have any questions at all, don't hesitate to ask.
Now it's your turn! Grab those paper flowers you have laying around and get busy Krafting!
KRAFT-TEMBER CHALLENGE- Use Flowers!! Don't have any paper flowers or maybe it's not your thing? No problem, just use flowers somewhere on your card. Maybe in the image or paper, or a die cut! You have all week to play along and don't forget to check back in two hours for another fabulous Tutorial/Challenge! You can upload your creations under the correct folder in the Facebook Group! Happy Krafting!
No comments:
Post a Comment