

Hello Krafty Friends!
Krafty girl Danielle C here today, to share with you an idea on how to create a scene with
multiple overlapping stamps without too much fuss!
I used Owl-Chemy stamp set
and you will need the following supplies:
A stamping platform
2 coloring paper (I used bristol velum) - identical size
mask paper ( I used Eclipse and Post it full stick notes)
Step 1.
Stamp masks of each element you would like to include in your scene,
make double for the elements you want to use twice. Fussy cut all elements.
Step 2.
Create your scene, by positioning your masks as you wish.
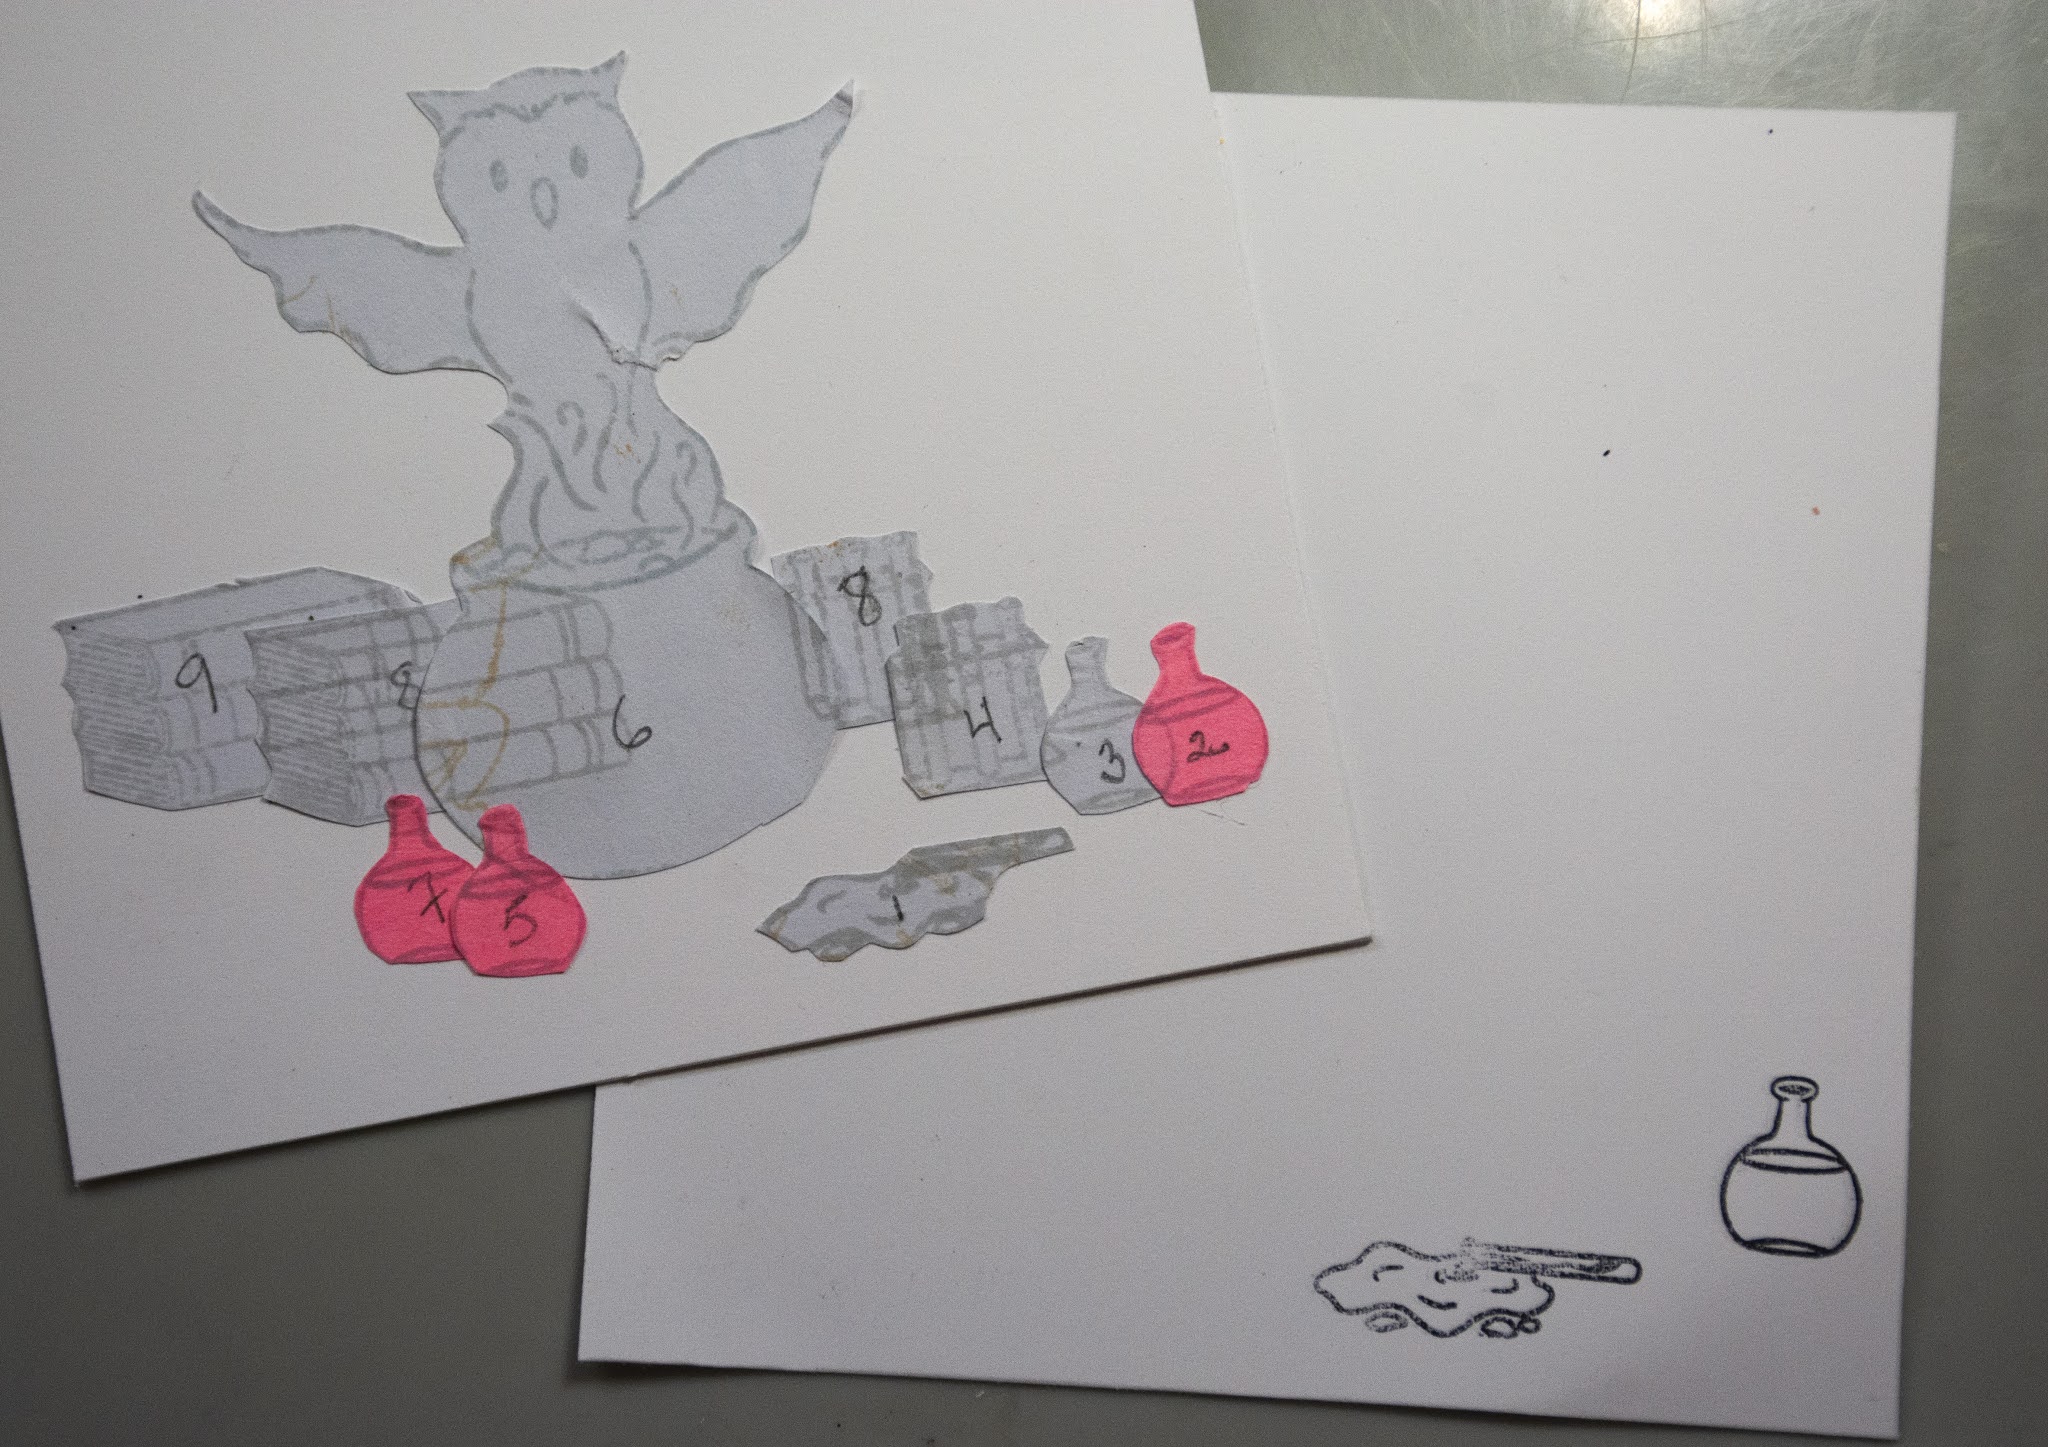
Number all elements, starting with the fist one to stamp, which means the ones that will stand in front of one another.
In my scene, you will notice that element No. 1, is alone.
In my scene, you will notice that element No. 1, is alone.
Elements no. 2, 3, 4 will overlap.
Therefore element 2 will be the first one to be stamped.
Same on the left of the picture, with elements 5 and 7, which are closer to you,
thus the first ones to the stamped.
Your image will look somewhat like this.
Your image will look somewhat like this.

Step 3
Image No. 1 is in front, and not touching anything, so I will stamp it first,
What I do is I position my paper withe the scene I creatred on the stamping platform,
put the corresponding stamp on top of the mask,
and close the lid to grip the stamp.
then, I will replace the cardstock with the one I will be stamping on,
positioning it exactly at the same place as cardstock with masks.
then I will repeat with image stamp No. 2.

This is what I get when images are stamped.
Step 3.
I will proceed with image no. 3 with the same technique,
and cover it with the mask, before I do image No. 4 and 5, on the left.
This what my sample image will look like when I position my stamps for images 4 and 5.

This is what I get, I will then cover my printed images with masks to proceed further.

Step 4
We will now stamp the main image, No. 6. and the no. 7 bottle
preparing the stamp with the same technique as above, this is what we get.

Step 5
Now, let's get ready to stamp the last images, No. 8 - I have two images No. 8, one at the left (books)
and one at the right ( test tubes holder), they will be stamped together. you see here, the result.

Step 6
The final set of booksl No. 9, stamped over the first set, close to the pot.

The image after removing all the masks, ready to color!

Don't forget to save all your masks,
I stick them on my stamp set for futher use.
I stick them on my stamp set for futher use.

Thank you for letting me share a little stamping tip with you today!
Hope it will come handy and gives you inspiration to create scenes with this lovely set,
and others from our collection!
Hope it will come handy and gives you inspiration to create scenes with this lovely set,
and others from our collection!
Stay safe and kraft a alot!
Happy Krafting.

Awesome card, I love it. Thank you for sharing.
ReplyDelete